I’m so happy to be bringing you guys another Wacky Wednesday post this week! If you haven’t come across one of these posts before, Wacky Wednesday is an awesome promotion that Ellie and Mac Patterns runs on a weekly basis featuring a handful of their patterns on sale for ONE DOLLAR!! Yep, that’s right. ONE DOLLAR. So take a look – if you’re looking for a great knit romper pattern, this just might be your lucky day!
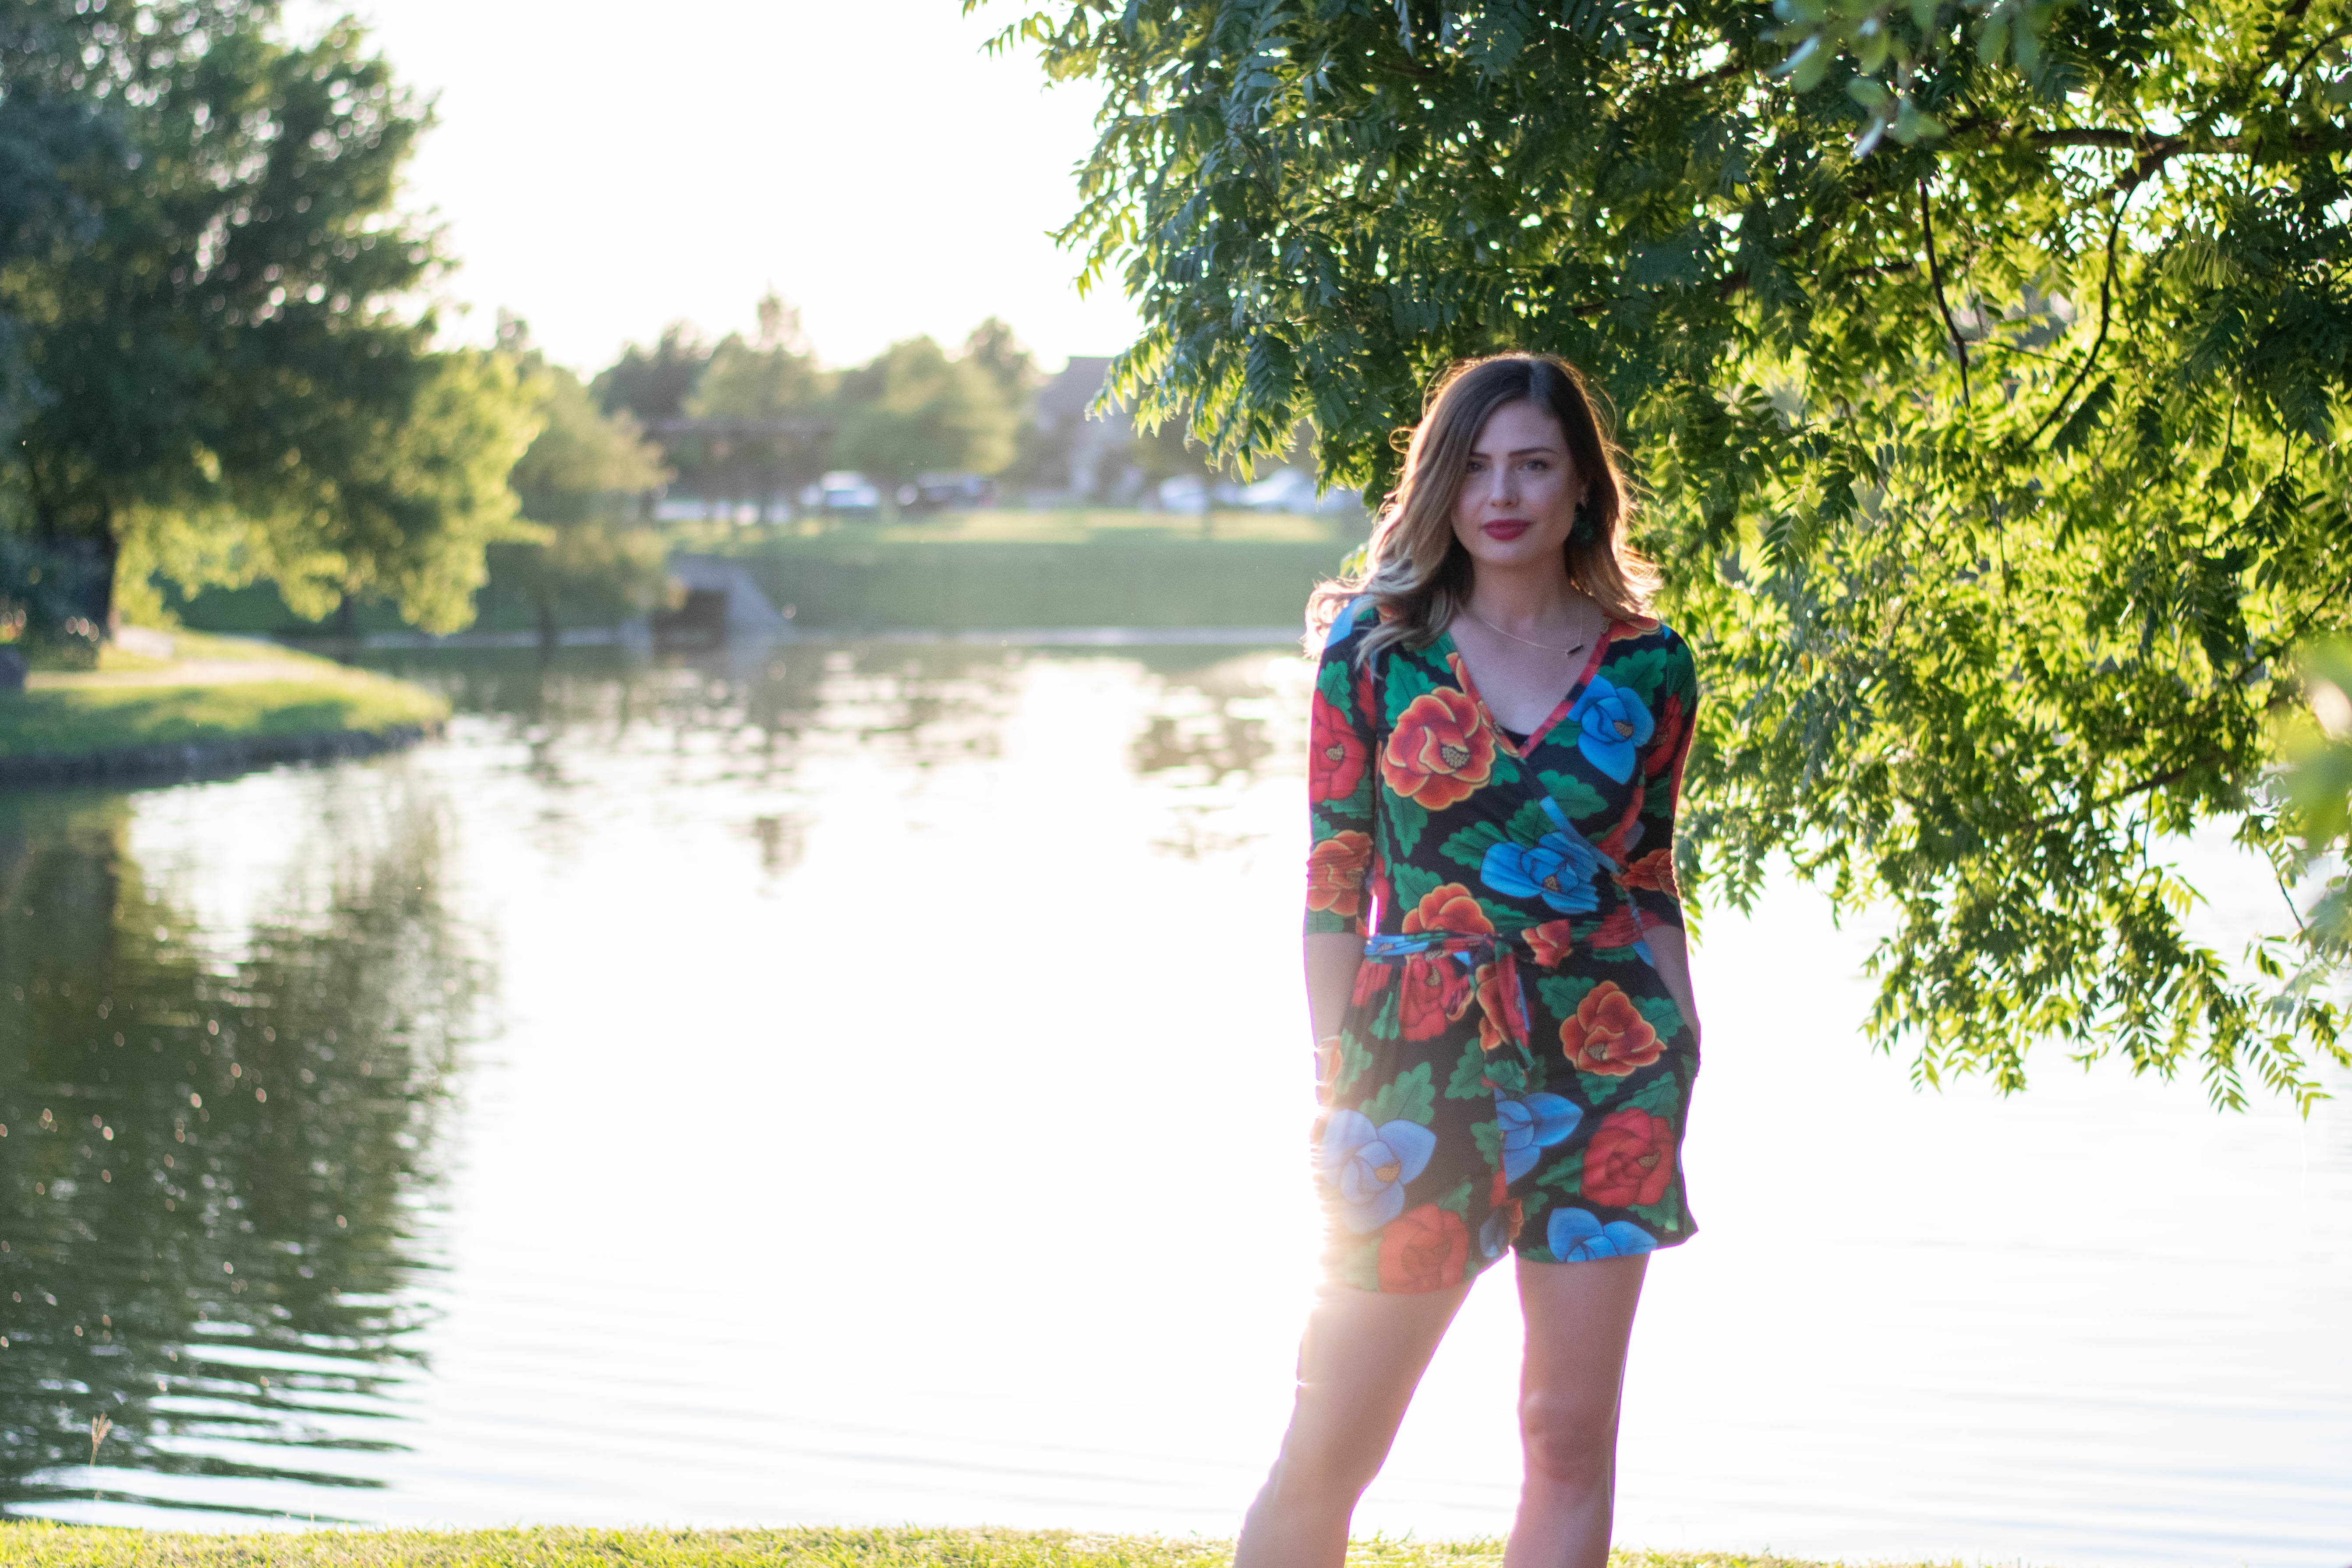
The South Shore Romper is a pretty recent release from Ellie & Mac, and I fell in love with it as soon as I saw it! I’ve been looking for a great knit romper pattern, and this just seemed like such a great option. It has a ton of options – sleeveless, short sleeve, ¾ length, full length, AND a long bell sleeve variation! There are also included cut lines for shorts, capri length, and full length pants. For my first version, I went with a ¾ length sleeve and shorts. I love a good balance of more and less coverage on top or bottom respectively, so this seemed like a fun way to work the shorts for summer!

My absolute favorite feature of this pattern is the wrap top. (Actually – is it really a wrap top if it doesn’t actually wrap around somewhere and fasten? Maybe this is more of a crossover?) The short edges of either side are gathered, then overlapped before getting sewn to the back bodice. You can play with the depth of the V-shaped neckline by gathering tighter or looser. I did mine with a pretty tight gather – I love a good deep V! This creates a really flattering silhouette, and (BONUS!) offers super easy nursing access for me!! I definitely suggest reading your pattern instructions before jumping into this one – there is a great description towards the end of the pattern instructions on how to measure your torso to determine whether or not you should add length to your romper bodice. I LOVE the look of a romper, but I am tall AND have a long torso, which can sometimes lead to weird fit issues with ready to wear rompers. Using the instructions provided, I was able to find that I have a 10.5 inch side waist, which is longer than average, and make adjustments to accommodate this.

Ellie and Mac Patterns are drafted for a 5’4” wearer. I’m a bit taller at 5’8” but this is never an issue, as all of their patterns are very clear where to add / subtract length and how much is recommended! For this particular pattern, a total of 0.5” is suggested per inch taller than 5’4”, so for me about 2 inches. The pattern suggests to spread this across the bodice and pants / shorts, based on the side waist measurement. My side waist measurement alone called for a total of 2.5” added to the bodice length, so I ended up actually removing some length from the shorts. I prefer a short short, so I ended up taking a total of 1.5” from the shorts, and I actually think I’d have preferred to take another 0.5” to 1” from the length!! If you’re having trouble following, here’s the simplified version of all of those numbers. The pattern suggests a total of 2” added to the pattern for my height. I added 2.5” to the bodice, took out 1.5” from the legs, so in total I’ve only added 1” (long torso, short shorts).

Another fun detail? Pockets. I mean seriously, who doesn’t want pockets on everything? My fabric is the slightest bit clingy, so I’m glad that I used self-fabric for the pockets, as they tend to try to peek out despite ironing. They’re a good size, though, and easily hold lipsticks and even my giant phone without too much issue!

A couple of things to note before I make another version (because there most definitely will be another version!). I had a lot of trouble keeping track of which were my front and back shorts pieces! I didn’t mark them well (which was totally my mistake!) and thought I could just keep them separate and remember which was which. Once they were constructed though, I completely lost track, and I can’t actually be sure whether or not the front is in the front here or not!! If they are backwards, it isn’t terribly noticeable. But in the future, I will mark this very clearly! I would also highly suggest adding a small notch at center front and center back of the bodice – again, I trusted myself on this one and used the folds at center front and back to line up with the center seams on the shorts. Unfortunately, the fabric must’ve gotten folded at another spot at some point during construction, because my center shorts front is not perfectly aligned at center front of my bodice! Not noticeable with the sash, but definitely noticeable without.

This romper was made using a poly spandex from Knit Pop! It is so very soft and comfy, and I feel like it clings to the body in just the right ways – enough to show off curves but not so much that it shows every last bite I have eaten today! This particular print is one that I found in their clearance section online last summer, listed as “Custom Fiesta Print” – I’m wondering if it was maybe a custom design that was overprinted? Either way, I got a great deal on it! I LOVE these bright colors, and it almost gives me some stained glass vibes through the flowers. I ordered a couple of yards thinking it might make some cool leggings, but I had no clear plan in mind. Thank goodness, because now (almost 1 year later!) it turned out to be the coolest print for this romper!

I used my handy dandy heat n’ bond on both the shorts and sleeve hems to get that nice, crisp finish that I’m so fond of. I serged seams where I could, but of course used my sewing machine for gathering stitches and top stitching. I chose to construct my sash in a different way that suggested by the pattern, using both my heat n’ bond and serger. I serged the two pieces together at center, then turned the full length piece right sides together and serged along the long edge and one short edge. I used heat n’ bond along the other short edge to turn the edge in for a nice hem. I turned the tube out, and gave it all a good press. I top stitched along the heat n’ bond short edge to close it, and along the serged short edge for continuity. Easy peasy, and it gets a similar effect!

So there you go!! If you want an awesome romper that you can customize to have so many different looks, I’d super suggest that you go ahead and get your hands on this pattern today! I’ve provided my affiliate link in the information below – I’d love if you’d consider purchasing the pattern through me! Fair warning, if you do, I get a small bonus into my account to use towards my own future pattern purchases! Either way, it is A DOLLAR and I’m hard pressed to think up anything that I could buy better than this for a dollar today!

Romper: handmade by me
Pattern: Ellie & Mac – South Shore Romper
Fabric: Knit Pop – Custom Fiesta Poly Spandex (now sold out)
Key Ingredients: Heat & Bond Soft Stretch (Lite)
Though the pattern used in this post was generously provided to me by the awesome team at Ellie & Mac Patterns, all opinions expressed are my own, as always!
- XX Elizabeth


Hi, This is a great review! I’m making this romper for my sister in law who will be nursing. Did you find it good for nursing? I won’t be able to measure her side waist as it is a surprise; she has similar build to me so do you think it’s worth using my measurements; using the pattern measurements; or maybe adding an inch just in case? I think being two small would be worse than being a bit too big! Thanks so much – your romper is beautiful!
Hi Lizzie! I found this to be perfect for nursing, actually! I didn’t make any adjustments on mine, and actually chose to sew one size smaller than my measurements suggested based on my previous experience with Ellie & Mac patterns. I hope your sister in law loves it!