Here’s the thing with poncho sweaters… They are insanely comfortable, they are like wearing a sweater hug, you can eat whatever you like and not worry about post-meal bloaty belly, and you still look put together the whole time. I mean seriously? You can’t lose here.
I had a great time sewing this pattern. It came together in a matter of a couple of hours from print to garment. The sleeves themselves are giant cuffs, as is the cowl neck, which means that both of these areas lack the need for any hem finishing. This means that construction is quick and simple – front to back, side seams, sleeve cuffs, cowl neck, and hem. There you have it. Though the hemline is rather long due to the oversized nature of the poncho, I used my standard soft stretch heat & bond to make the hem a breeze. I didn’t time myself, but I would truly bet this top could be completed in about an hour!!

Another great thing about this pattern was the instructions. Conversational and fun but straightforward – they were so well written. As a sewist with a couple years of experience, I didn’t feel like anything was over-explained in bothersome way. However, any beginner would feel comfortable sewing with these directions, and they even breakdown almost every piece of the instructions. Don’t know how to choose an appropriate fabric? They’ll help with that. Fall between two sizes? No worries – they explain how to handle that, too!

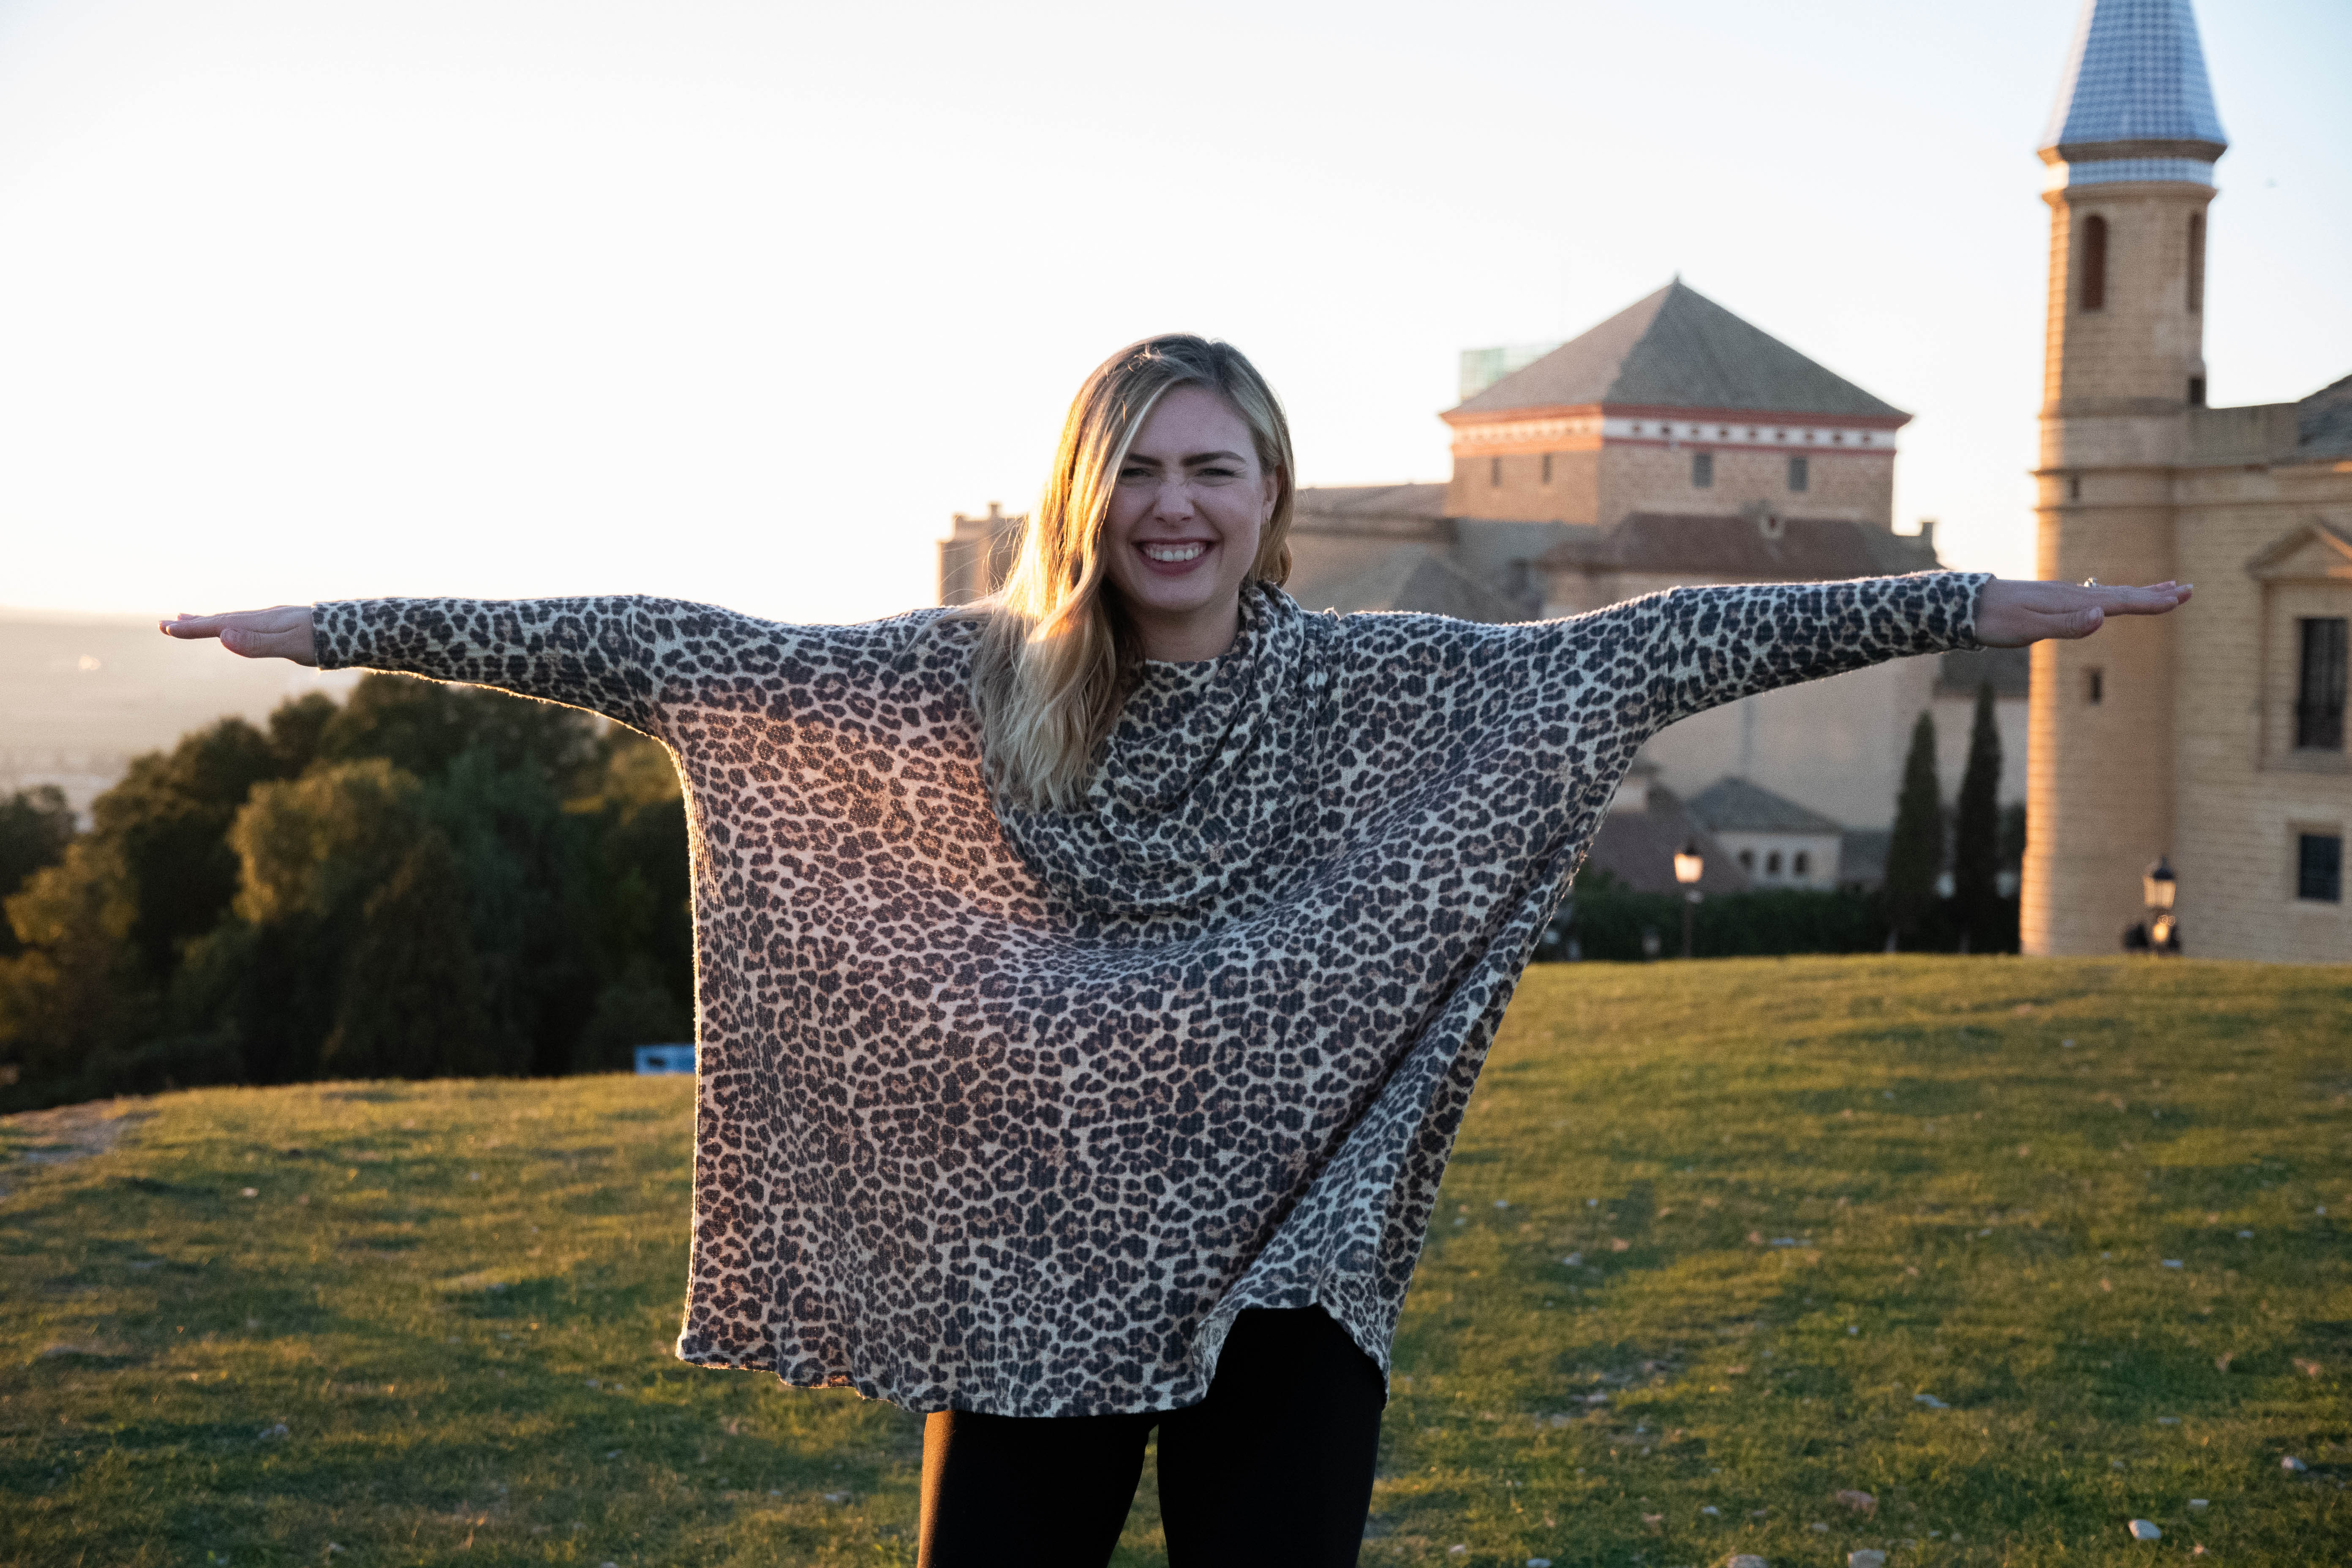
Before I go any further, quick note – I did NOT customize my size well. This issue was on me, and not any fault of the pattern or the directions. My recommendation to myself for the future would be when your measurements are borderline, if the garment is oversized, don’t size up!! I was all over the size chart on this one – my bust put me in a 2, while my waist put me in a 10. Before having a baby, I always sized down when I had to make a choice, and I loved the fitted look I typically ended up with. However, post-baby I’m a little less confident in my body and a little more nervous about looking wrong in my clothing, so when there is a question, I always size up. I’ve actually ended up with quite a few too-large garments over the past year or so, and not always in a way that I can play off as cute and oversized! Luckily, I still feel like I can make this top work, but a note for the future (and to you, if you’re reading this and considering what size to make) – if you’re making a poncho that has absolutely no fitted areas, and is wide everywhere… No need to size up. I made a size 6 here, thinking that 6 would be fine on my waist (knowing it was loose) but wouldn’t be too overwhelmingly large over the bust. Next time, I’ll stick with a 2!

When I first saw this pattern, I knew I needed to make it in a waffle knit. I had a cream colored waffle knit in my stash, but I already had plans for that one and I thought this one needed something different. I found this great brushed waffle knit at Knit Pop and it was meant to be! I love the way this top turned out. I do think in the future, I’d love to make another version a couple sizes down and in a black waffle knit.

This is a great wardrobe staple. This was one of the tops that made my “cute / comfy / warm” short list for Spain earlier this year, and it worked out so perfectly. It looks cute with my Converse, but also with cute boots. I didn’t have to worry about a scarf on frigid days, because that giant cowl neck kept me warm and cozy no matter the weather! And thanks to the fabric (strong believer that animal print is a neutral), it matched with everything I packed, from black accessories to brown accessories, to my red wool coat or jeans. Easy, stylish, and comfortable.

Top: handmade by me
Fabric: Knit Pop – Light Taupe Brushed Waffle Leopard Animal Print Poly Rayon Spandex
Pattern: DIBY Club – Mae Poncho
Key Ingredients:
Brother XR9500PRW Sewing Machine
Brother 1034D Overlocker / Serger
Schmetz Jersey Ballpoint Needles
Dahle 36×48 Self-healing Cutting Mat
Heat & Bond Soft Stretch (Lite)

Though the pattern used in this post was generously provided to me by the awesome team at DIBY Club, all words and opinions expressed are my own, as always! Links provided throughout this post may be affiliate links – if you choose to purchase any products through these links, I may receive a small commission, at no cost to you. This simply helps me justify the costs of my sewing habit and the time it takes to share it with you!! Happy Sewing!
- XX Elizabeth